Watch the tutorial, practice these skills, and submit a screenshot as evidence of learning.
1️⃣TUTORIAL
Click the image below to watch the tutorial video and reference the articles linked below as needed.
What are Shared Drives?:
https://support.google.com/a/users/answer/7212025?hl=en&ref_topic=12369809&sjid=9056519215654455763-NA2️⃣PRACTICE THESE SKILLS
Take time to practice the skills that you learned in this tutorial by doing some or all of the following activities: creating a shared drive that you might use with colleagues, emailing members of a shared drive about upcoming events, investigate Shared Drive activity, shortcut folders or files to your personal Drive, and star folders or files.
3️⃣EVIDENCE OF LEARNING
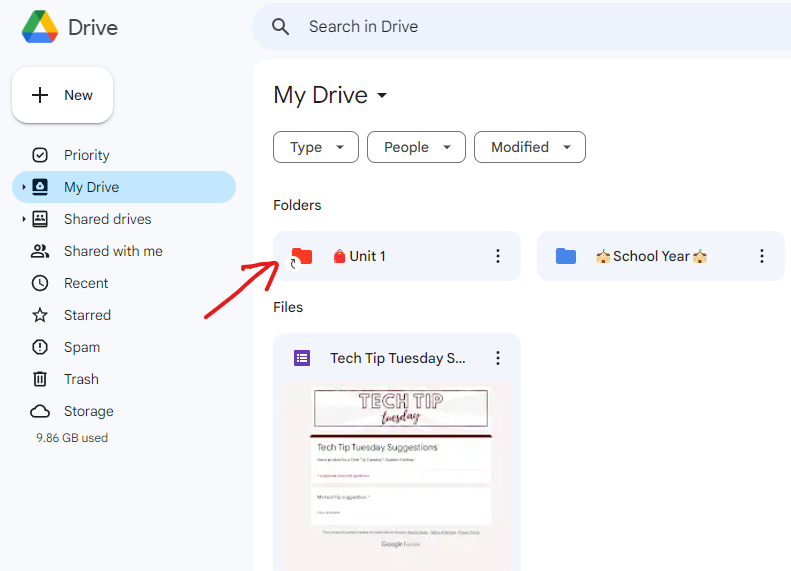
Create a Shared Drive with some files in it or find a Shared Drive that you belong to. Choose a file or folder to add as a shortcut to your personal Drive. Submit the screenshot.
Example:
 As a reminder, directions on how to take a screenshot are listed below. Please do not use a smartphone to capture and upload a screenshot as the image file types are not always compatible.On a Windows device:
1. Open the Snipping Tool
2. Click 'New'
3. Use your mouse to select the part of your screen to capture
4. Save the screenshot by clicking 'Save As'. Be sure to select the location that you'd like to save it to.
On a Chromebook:1. Press Control+Shift+'Switch Window' button
2. Move the Crosshair to select the part of your screen to
3. Image is most likely saved in your Downloads folder
On a Mac:
1. Press Shift+Command+4
2. Move the Crosshair to select the part of your screen to capture
3. Image is most likely saved on your Desktop
